meta data for this page
Advanced features of the AP Wiki
This page mostly deals with issues specific to the APwiki. For general help on dokuwiki see the local dokuwiki syntax help and/or the official manual.
How to add a page
There are several ways to add pages in dokuwiki:
- index menu:
- Right-click on a folder in the site index. A menu pops up. Choose “New page”. This enters the dokuwiki text editor. The page will be placed in the folder you right-clicked. You may add a link in the head page of the folder for consistency.
- search form:
- Enter the desired wiki path in the search field on the top right. On search the top most button on the far right of the dokuwiki window turns into a “create page” link. Click to enter the dokuwiki text editor.
- wikilink:
- Add a wiki link on an existing page, save, click on the red link, click on the topmost button on the far right of the dokuwiki window (“create page”). This enters the dokuwiki text editor.
- offline:
- Write the page offline with a text editor. Ask an admin to copy the file to the appropriate place in the tree of dokuwiki pages.
How to move a page
Somewhat surprisingly, there is no simple way to move pages around in dokuwiki. This is due to the interconnections in the archive of page versions and of course inter wiki links.
The easiest way to move a single page is to start a new page, copy-paste the contents and delete the original. A side effect is the loss of the archive of versions.
Copy-paste quickly becomes excessively tedious if you intend to move a whole hierarchy of pages. The move plugin was written to deal with mass moves gracefully. However, this plugin needs special permissions as it must access protected areas of the dokuwiki data set. Kindly ask an APwiki admin to execute the move.
How to delete a page
The standard way to delete a page is to enter the dokuwiki editor, remove all content and save. Empty folders are automatically removed by dokuwiki. If there are many pages to remove, you can ask an admin to delete them directly in the file system of the server.
Page removal is permanent and includes all previous versions of the page. It may be possible to recover pages from global back-ups of the server at RRZN. This is a tedious process, though, which is not guaranteed to succeed.
General mark-up
New lines, new paragraphs
Dokuwiki ignores single line breaks in the page source.
That is, there is no line break in the text when the page is rendered in a web browser.
You can force a line break with double back slash (\\).
Two line breaks, akka an empty line, are interpreted as the start of a new paragraph. There is about half a line additional vertical skip. See the source of this paragraph for examples.
Space matters
Generally, additional space charcters are ignored in dokuwiki syntax. But there are notable exceptions:
- an enumeration starts with two spaces and a
-character
- a list item starts with two spaces and a
*character- deeper level list items starts with four spaces and a
*character
- tables and images can float in continuous text. Whether they float left or right is determined by space inside the curly brackets. An image floated to the right would be
{{ image-link}}. See the syntax help page for details. - alignment of items in a table is controlled by space characters in a similar way as with images. See the syntax help page for details.
Deep links
By default, the browser sends you to the top of a page if you follow a wiki link. The anchor plugin allows you to aim to a specific spot somewhere down the page.
- put
{{anchor:NAME}}where you want the link should touch down - link to this spot with
[[PAGE#NAME|link text]]
“NAME” is the name of the anchor. “PAGE” is the path to the page to be linked.
Math
Mathjax is a technique which renders formulas on the client side based on javascript, latex and mathML. This reduces the load of the server. And it allows for better looking layout because only the local browser knows which fonts it uses for the non-math text. As of 2014, all major www browsers can deal with mathjax.
The plugin tablecalc provides a Mark-Up to integrate Mathjax formulas into your dokuwiki page. Dollar characters delimit inline formulas just like they do in latex. Like this: $123 \cdot \pi$. Double dollars render formulas in their own line, aka “displaystyle”:
$$ 42 \times \frac{a}{b} \;=\; 17 $$
While MathML uses the same syntax as latex, it does not use the latex engine at its core. Consequently, certain more advanced latex mark-up tokens fail to work in MathML. If you need these features, you can make the server render the formula. In this case, delimiters are <latex> and </latex>. This works <latex>for general \LaTeX-text, too</latex>
Tables
A number of plugins provide features advanced features for tables.
Excel style calculations
The plugin tablecalc adds the ability to do excel style calculations. There is a number of math functions. One of the most useful is sum(range). Check the table below for a simple example. The manual of the tablecalc plugin shows how to do more complex stuff.
In-place-editing of tables
The plugin:edittable plugin provides a nice environment to edit tables in place. To enter this environment, click on the edit button at the bottom of the table. The table opens in a mode that roughly resembles a spread sheet application. Double-click on a cell to edit the content. Right-click on a cell pops up a menu with various actions to perform on the table. On save, the plugin adds space characters to align columns.
You don't have to go the fancy in-place-edit way. Tables can also be edited in ordinary dokuwiki edit mode.
There is a button “insert table” in normal edit mode which provides a table creation wizard.
Coloured table cells
You can paint the cells of a table by preceding the entry with @FOOBAR:. Replace “FOOBAR” with your favourite colour. You can choose from every colour known to HTML. This includes numerical RGB-codes.
| one | two |
|---|---|
| three | four and a half |
| five | 17 |
| seven | 25 |
| sum: | € |
Colored code
The syntaxhighlighter4 plugin can render your code in a colorful way. It understands many common languages like python, c++, java and perl. LaTeX is supported, too. Basic usage is:
<sxh LANG> CODE </sxh>
LANG is the language of your code. Hello world example:
#include <stdio.h>
int main()
{
   printf("Hello, World!");
   return 0;
}
For advanced options see the github docs of the plugin.
Over the years, the regular code environment acquired highlighting ambitions, too:
List of files in a folder
You can use the filelist plugin to list files in a folder of the media section of APwiki. Use the wildcards * and ? to specify which names to show. Specifically, unix style globbing is used for the selection.
There is a host of options to modify the search and tweak the output. See the manual of the plugin for details. The plugin has been configured to give the size by default. The comand to list all PNG files that start with “d” in the example_images folder would be:
- filelist
{{filelist>.:example_images:d*.png}}
Images and movies
Acceptable image formats
- JPG
- is the most abundant compressed image format on the www. Its ability to achieve arbitrary compression comes at a price: at some point image quality deteriorates significantly. JPG is great for photos. Not so great for graphics with sharp edges.
- PNG
- is an image format with lossless compression. It is particularily efficient for computer generated graphics with large areas of plain color. PNG is generally good for computer generated graphics and logos – less so for photos
- SVG
- is a vector image format developed for web pages, which is sanctioned by the WWWC. Vector images scale losslessly. A circle will keep its nice smooth boundry no matter the zoom scale. Because of this, SVG is particularily useful for detailed graphs and schematics. This format puts more demands on the local browser. Because of this, it took some time to be universally adopted. Since 2011, all major WWW browsers can deal with static SVG. The last to join the club was Microsoft with IE9.
Show all images in a folder
The gallery plugin shows a gallery of all images in a folder. The plugin understands quite a bunch of options. A useful choice is “lightbox” combined with “showname”
- lightbox: a click on an image launches a nice javascript viewer
- showname: adds a link with the file name. The link leads to a automatically generated page which can show the image in full resolution and offers a download link.
Size matters. On page load, all images are fetched immediately in full resolution. Recommendation: Reduce images to about 500 kB. You may use convert from the imagemagick suite.
{{gallery>wiki:example_images?lightbox&showname&4}}
Float images to the right
- Images can be floated to the right. Put two spaces just after the left curly braces.
- Thanks to the imagebox plugin an additional layer of square brackets will add a frame and display the link text as a caption
[{{ wiki:example_images:debian-swirl.png?200|A framed image with caption, just like in Wikipedia}}]
Clear images and tables before the next paragraph
If there are many floating images on a page, they tend to stack unfavorably. The same is true for tables. The plugin clearer provides a bandaid: Use three backspaces \\\ at the end of a line to shift all text below the last float that is currently in the stack.
See fig. 42
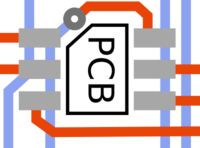 Fig. 1: An image with an enumerated figure caption.
The imagereference plugin adds numbers to the caption. Images can be referenced in the main text of a page. The syntax is slightly more complicated than the square brackets above. But as you can see with figure 1, the pop-up text can differ from the text of the caption.
<imgcaption PCB|An image with an enumerated figure caption.>{{ wiki:example_images:pcb.png?200|pop-up text}}]</imgcaption>
Screencasts
The plugin htmlvideo2 extends the scope of double curly brackets to videos. The video can be linked from the local dokuwiki. Or it gets streamed from an external source. The player supports mp4, webM and ogv. The syntax ist very close to inclusion of images. Spaces are interpreted for alignment. The path to the video must by followed by a question mark immediately:
{{ VideoURL | DokuwikiPathToVideo? WIDTHxHEIGHT & PathToPreviewImage | AlternateText}}
Example with default width and height:
{{ :qti_faq:scatterplotundbeschriftung_kl.mp4? & :wiki:playground:qtiplot_screenshot.jpg |}}
Categories
The plugin plugin:tag provides a way to attach category tags to individual pages. All tags of a page are shown as links at the bottom of a page. They link to a list of all pages that contain the respective tag. Add this line to attach the tags “foobar” and “baz” to a page:
{{tag>foobar baz}}
Tags can be searched and selectively displayed. To list all pages that are tagged with “foobar”:
{{topic>foobar}}
The command {{searchtags}} produces a form that lets the reader choose tags to include or exclude from a search. On search the plugin presents a list of pages that contain these tags. By default, the search refers to the whole wiki. But you can restrict the scope to a specific name space.
There is a host of options to influence the search form and the presentation of the result. See the plugins manual for details.
An alternative way to offer links to tagged pages is a word cloud compiled by the plugin word cloud. Tags attached to many pages stand out in the cloud.
Hidden comments
The comment plugin allows you to use invisible comments similar to C programs. Everything between /* and */ is ignored by the dokuwiki render engine. Use this hidden text to give advice in page templates.
Fancy formatting
Draw attention to a note
Use <note>foobar</note> to put a portion of text in a highlighted box. This feature is provided by the note plugin.
Colors, containers, columns and Co.
The wrap plugin can do similars tricks as the note plugin. But it also provides a ton of additional formatting options – indent, outdent, highlight, highlight even more, multi columns, floating boxes. As a general rule, formatting should be done by CSS sheets. But for a one-off a <wrap> may the appropriate tool.
The wrap can make portions of the page print but not show up on screen or the other way round.
See the examples on this page for a comprehensive overview on what the wrap plugin can do.
Definition lists
The plugin yalist adds definition lists to the syntax of dokuwiki:
- syntax
- Two spaces and a question mark at the start of a line for the definition term. Two spaces and colon at the start of the next line for the definition.
- appearance
- The appearance of the definition list is governed by a CSS file. Ask an admin if you need it to change.
Lists with paragraphs
The plugin yalist also adds the ability to have a list item span several paragraphs. Its syntax is similar to ordinary list items:
  -- ordered list item with multiple paragraphs
  ** unordered list item with multiple paragraphs
  :: definition list definition with multiple paragraphs
  .. new paragraph in --, **, or :: environment
Local icons
In addition to the standard icons there are a few locally defined icons:
-->transforms into:ok:transforms into:Ok:transforms into:OK:transforms into:no:transforms into
Admin advice: To add more local icons, you'd have to edit conf/smileys.local.conf and add an image in the folder lib/images/smileys/local/.
A key to keys
The keyboard plugin provides a nifty way to communicate key presses. Most characters render as an icon of the corresponding key. But there is some magic going on. The plus (“+”) and minus (“-”) characters are interpreted as dividers for complex key sequences. In addition a capital A or C are rendered as the Alt- or Ctrl-key. Enclose characters in ' to suppress the magic.
<kbd>F1</kbd>is rendered as F1<kbd>A</kbd>is rendered as Alt<kbd>A+'A'</kbd>is rendered as Alt+A<kbd>A+C+e</kbd>is rendered as Alt+Ctrl+E
<html><h3><u><a href=“http://bibo.iqo.uni-hannover.de”;>Link-in-header</a></u> text next to the link</h3></html>
There is no official dokuwiki way to put a link in a header. If you really need this, you can cheat with HTML:
- header with HTML link
<html>
  <h2>
     <u><a href="http://iqwiki.iqo.uni-hannover.de";>
          link-in-header
        </a>
     </u>
     text next to the link
  </h2></html>
- example in one line
<html><h2><u><a href="http://bibo.iqo.uni-hannover.de";>Link-in-heading</a></u> text next to the link</h2></html>
There is a draw-back to this cheat. The header does not appear in the table of contents.
Todo lists
The plugin todo presents lists of tasks that can be checked off with a mouse click. The tasks can be placed anywhere on the wikiseiten. They are collected and displayed with ~~TODOLIST~~. The optional parameter completed:no restricts the display to open tasks.
Add ~~NOCACHE~~ to make sure a TODOLIST shows the current status.
You can restrict the list of tasks to a specific name space, or to those assigned to a specific person.
Todo entries on the page
- things, user MrT should do
- something else, somebody else should do
already done by MrT
Open tasks
To show a list of open tasks in name space “NameSpace” you can add this line to a page:
~~TODOLIST completed:no header:firstheader ns:NameSpace ~~
Here is a list of all open tasks in the namespace “wiki”
Discussions
The discussion plugin provides a way to talk about the contents of a page.
Put the string ~~DISCUSSION~~ on a page to add a discussion section.
Permissions to read and write discussions can be different from the permissions for the content itself. Discussions can be closed but still visible.
Messing with the menu
The entries in the menu get sorted alphabethically by default. You can intervene with priority tags in the page source to override default sort. Dokuwiki sorts the index entires by priority and puts the untagged pages on bottom. To put a page on 42nd priority, thae tag would be:
{{indexmenu_n>42}}
menu entry != top header
Usually, the top heading of a page provides a decent entry for the index menu. But sometimes this is not quite ideal. E.g., the top header may be longer than desirable in the index. Unfortunately, there is no option to override index menu options for a specific page. However, there is a way to cheat: Use raw HTML for the top heading: <html><H1>Foobar</h1></html>. This will render in the header style given by the current CSS. But it won't get recognized by the dokuwiki engine. Consequently, the index menu ignores it and shows the next heading instead.
Update the index
Modern www browsers rely heavily on caches. This applies in particular to the index menu and results in snappy behavior. Dokuwiki does a good job to tell the browser when to refetch the tree. But sometimes it misses a beat and the index is out of step with the site.
You can tell the browser to forget the cached data and reload the page. This is done by appending the string ?purge=true to the URL.
Example: http://iqwiki/?purge=true
Hiding in plain sight
If there is some portion of text you would rather not show right away, the plugin hidden provides a way to hide the content. It hides a protion of text and presents a click-to-display-button instead. Useful for overly long code listings. Syntax:
As time goes by
Dokuwiki provides several fairly sophisticated ways to presents events, incidents and time frames. You can use them for plannning and/or logging.
Diary
The plugin plugin:yearbox creates a calendar, with a new page link for each day. This can be used to establish a (collaborative) notebook organized by date.
Events on a timeline
The eventline plugin provides a nice way to visualize overlapping stages and mile stones of a project. Technically, it takes the open sourced timeline widget developed at MIT as part of the Simile project and wraps it in a dokuwiki layer. For an example of a full fledged demonstration, see the Kennedy assasination timeline at MIT. Note the comment bubbles which can be accessed by mouse clicks on an event.
To add a timeline to a page, you'd use the command
<eventline>&file=TimeLineData&OPTION1=VALUE1&</eventline>
The string TimeLineData gives the name of a dokuwiki page that contains the dates of events and periods of time. The data page can be edited like any other page in the wiki. The actual dates are given by <event> tokens nested in a <data> statement. I addition, the special string ~~TOOLS:both~~ is required. The TOOLS statement renders some action-links on the page. The most important is “export_to_timeline”. When clicked, the contents of the data page are parsed to produce the timeline graphics. Example of a TimeLineData page:
- TimelineData.txt
<data>
<event start='February 20 2015' end='February 25 2015' title='Cangaroo jump' durationEvent='false'>
The longer the legs the higher the jump.</event>

<event start='February 22 2015' end='February 24 2015' title='Fruit fly endurance marathon' durationEvent='true'>
Fruit flies like a banana.</event>
</data>
~~TOOLS:both~~
There is a host of options to modify the look and behaviour of the widget. See the manual of the plugin
Zombies, orphans and dead links
The page Tote Links und Waisenkinder lists all dangling dead links in APwiki. It also gives an overview on pages that are not linked to anywhere (“orphans”). Use these lists for maintainance. You can create your own maintainance page. The syntax of the orphanswanted plugin and the orphanmedia plugin allows you to restrict the lists to certain subspaces of the APwiki.
If you feel like garbage is collecting in the upload area, you can ask an apwiki-admin to scan for files that are not used anywhere in the APwiki (“zombies”).
